
Cotton Velour Towels: DTF Heat, Time, Pressure and Peel
Nov 19th 2026

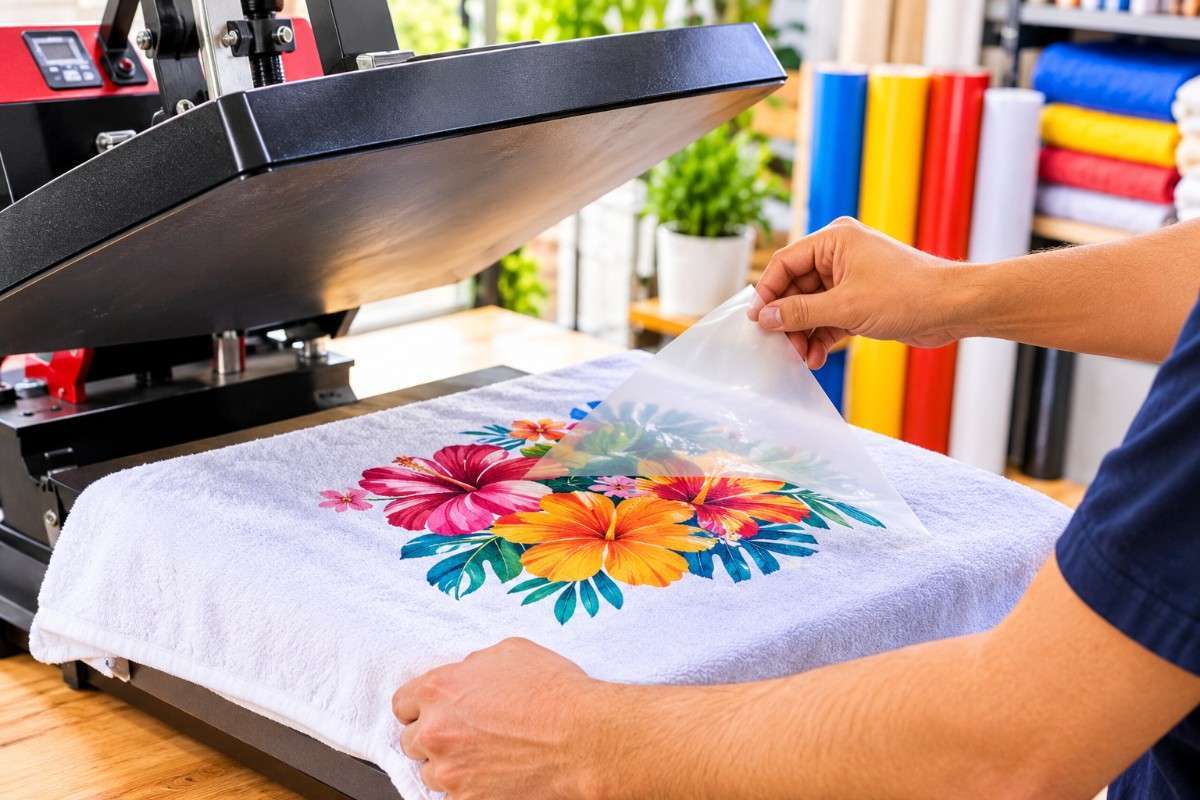
Getting accurate DTF heat press settings when printing onto towel substrates can be tricky. You may find that even after 3 washes, some lifting occurs at the edges of the print. Due to the thickness of velour substrates and high-profile stitching, the adhesive does not get heated and pressed uniformly as it would on a flat T-shirt substrate.
In this post, we outline the steps required to print DTF onto cotton velour towels. This post starts at the heat press stage. We give example settings for 100% cotton velour, and how to overcome common problems seen when prints go through washing.
The Basics Of DTF Heat Press Settings
All DTF transfers include a hot melt adhesive (usually TPU powder). During heat pressing, the adhesive is heated to make it pliable, and then forced into the fibres of the fabric using pressure. Once cooled, the inks will become permanently attached.
There are four factors that affect how effectively the inks become adhered to the fabric. The temperature will determine the melting point of the adhesive, the dwell time will determine how thoroughly the heat is applied, the pressure will determine how much melted adhesive comes into contact with the fabric, and the peeling time will determine if the film cleanly separates or causes some tearing in the print.
Changing one of these factors will change the others. However, because we are printing onto towels, the weight of the material is an extra factor to consider. Because the velour is dense, less heat will reach the adhesive, causing underbonding. This means that, commonly, settings used to print onto shirts will cause under-bonded prints on towel substrates
Recommended Settings For Cotton Velour Towels
|
Step |
Temperature |
Time |
Pressure |
Notes |
|
Pre-press |
Same as main press |
5 to 10 sec |
Medium |
Repeat until no steam rises |
|
Main press |
300 to 325°F (149 to 163°C) |
12 to 20 sec |
Medium-firm to firm, about 40 to 60 psi on air presses |
Start at 310°F for 15 sec |
|
Peel |
Set by film type |
Hot peel within seconds, cold peel once fully cool |
None |
Always match the film |
|
Finishing press |
Same as main press |
5 to 10 sec |
Medium |
Parchment or Teflon sheet on top |
Start With The Supplier Sheet
As a guide, in general, DTF transfers will be printed at temperatures between 290F and 350F. Films will have different formulations depending on the temperature. If using a film suited to printing at 325F, it will not perform well at 295F. Start with the temperatures specified by your supplier. If using thicker towels than standard hand towels, increase pressing times slightly (by a few seconds) but do not change the temperature.
Why Cotton Takes Heat Well
Cotton will not melt or scorch at these temperatures. Polyester is much less forgiving. Most poly blanks require a temperature of 280-300F. However, coloured polyester can cause a problem for you. It may cause dye to leach into white prints (dye migration). This is why cotton terry velour towels are normally used as blanks for DTF.
Dialing In Heat, Time And Pressure
Checking True Platen Heat
Temperature gauges on heat presses can be inaccurate. You may find that even though the gauge reads 310F, the temperature at the front of the plate is much lower. Once the desired temperature has been reached (after around 5 mins), check the temperature across the middle of the plate and the 4 corners.
If the temperature is too low, the adhesive will not fully bond to the fabric and the print will wash off. If the temperature is too high, it can cause dull colours, deformed transfer film and curled edges. To avoid the edges being too cool, position prints towards the centre of the platen.
Adding Time For Thick Pile
Depending on how thick the pile is, increase the time by 3-5 seconds compared to shirts. However, increasing the time further will not help if the pressure is incorrect. A time much higher than 20 seconds can cause a stiff print or burnt film.
Even Pressure Over The Hem
Prints on towels failing due to pressure is a common issue. As the pile is thick, pressure isn’t evenly applied. If there is a stitched hem in place on the towel, the top platen may be pushing against one side of the design less than the other. Placing a 3” motif 1” above the hem on 16x26 white velour hand towels makes it very clear.
Placing a cushion/foam underneath the design area will raise it, so that even pressure is applied. To check it is even, place a strip of paper into the corners and middle of the design. Close the press and check that all the strips are very difficult to remove. If any paper can be easily removed, adjust the pressure so that it is level, or move the cushion around. Then begin printing.
Hot Peel And Cold Peel Timing
Hot peel films should be peeled open after a few seconds. As the adhesive is still soft, it will easily come away from the fabric. Cold peel films should be left to cool completely. Peeling them too early may cause the adhesive to begin pulling away from the fabric in fine lines and edges.
Warm is not the same as cold! Before peeling the transfer, feel the reverse of the film to ensure you are not peeling it while it is warm. Glitters and most specialty films are cold peel. Once peeled, pressing the print with parchment paper for 5-10 seconds will help fix the ink deeper into the pile and reduce any surface shine.
Preparing Velour Towels For The Press
Pre-Pressing Out Moisture
Remove excess moisture from the towel by applying some pressure. If the towel is left in a damp condition, once the platen has been applied, steam will form. This will cause fraying around the edges of the towel.
With no transfer on, apply pressure and allow it to steam out. Repeat this until no steam is produced. Using a lint roller quickly will also help remove loose fibres to prevent them from becoming caught under the film.
Choosing The Velour Face
As terry velour is cut down flat on one side and remains looped on the other side, small text and lines will remain intact on the flat surface. However, on the looped side, the text will be damaged. As such, using the flat surface of the velour terry allows clean adhesion of your DTF transfers.
Fixing Common DTF Print Problems On Towels
|
Problem |
Likely Cause |
Fix |
|
Design lifts during the peel |
Low heat, short time, light pressure, or a cold-peel film pulled too soon |
Check true platen heat, add pressure, wait for the correct peel temperature |
|
Edges peel after washing |
Moisture left in the towel or uneven pressure near the hem |
Pre-press longer, use a pressing pillow, add a finishing press |
|
Print cracks after washing |
Over-pressing, under-cured powder, or a large solid design that stays stiff |
Lower heat or time slightly, cure the film fully, break up large solid areas |
|
Colors look faded or dull |
Too much heat or time |
Drop the temperature by 10°F or shorten the press |
|
Fuzzy edges or broken lines |
Printing on the terry loop side |
Print on the smooth velour face |
|
Shiny box mark around the design |
Too much heat or pressure on bare pile |
Cover with parchment, finish press, brush the velour once cool |
Large Designs On Beach Towels
If you are printing a large design onto a 35x70 cotton velour beach towel, you may struggle to fit it within the 16x20 platen. Printing the design in 2 sections causes overheating in the overlapping section.
This can cause a glossy/ rigid streak in the design. To avoid this, it is best to use a larger platen. If unavoidable, make sure that the overlap is minimised. Cover the printed half with parchment paper.
Test Pressing Before A Bulk Order
Print 1 towel in the conditions you plan on printing the bulk of your order in. Allow to sit for 24 hours, then wash and dry as you would for your customer. Check edges, fine lines and large areas of solid colour carefully.
If printing a large quantity or repeating an order, print the same sample 2-3 times to ensure consistency. Once consistent results have been achieved, note down the temperatures and pressures used. Keep this sheet next to the press so that all operators can print using the same settings.
Frequently Asked Questions
What temperature should I print my DTF Transfers on Cotton Towels?
For 100% cotton velour towels, a range of 300-325°C is suitable for most films. We recommend starting at 310°C and adjusting in 5-degree increments. If your transfer provider recommends a different temperature range, please follow that instead.
How long should I print DTF transfers on towels for?
Generally, print for between 12-20 seconds (3-5 seconds longer than on T-Shirts). Include a 5-10 second pre-press and 5-10 second post-press.
Can I use a domestic iron to apply DTF Transfers To Towels?
Not reliably. As a thick pile cannot get even heating or consistent pressure from an iron, fraying is likely to occur after washing. If you are selling these towels, we recommend using a heat press.
How do I wash DTF Printed Towels?
Allow to cure for at least 24h. Wash in cold or warm water with a gentle detergent. Do not use bleach or fabric softener. Tumble dry on a low setting or air dry. Do not iron directly onto the design. General washing guidance for towels can be followed to look after your cotton velour towels.
Summary
If the blanks are kept consistent, good settings can be achieved for printing DTF transfers onto cotton towels. However, if the pile height, weight or moisture varies between boxes of blanks, re-testing will be required for each order. If you have consistent 100% cotton velour towels, a single set of tested values can be used throughout.
We have cotton terry velour hand towels, golf towels and beach towels with smooth printing surfaces available in stock. Orders placed will be shipped the same or next working day from Atlanta, GA.
Most orders will arrive within 2-6 working days. Get a sample sent to you to conduct your own testing. Then, order some blanks to get ready for your next DTF order!